This post covers how I set up k8s-topo
on a Raspberry Pi cluster to perform network simulations. k8s-topo is a sweet
project that lets you spin up arbitrary network topologies on Kubernetes
clusters. The router nodes can be cEOS, Quagga, or FRR. However, on ARM, the
only supported router image is FRR since it’s the only one that currently has
ARM images available.
Here’s a picture of the cluster:
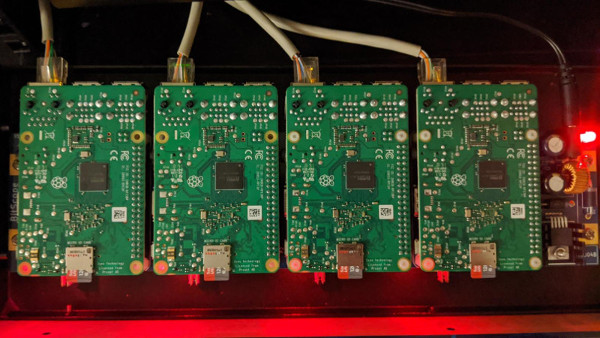
If you’re curious, the backplane is a Bitscope Blade. I’d like to write another post on how to set up and provision such a cluster when I find the time.
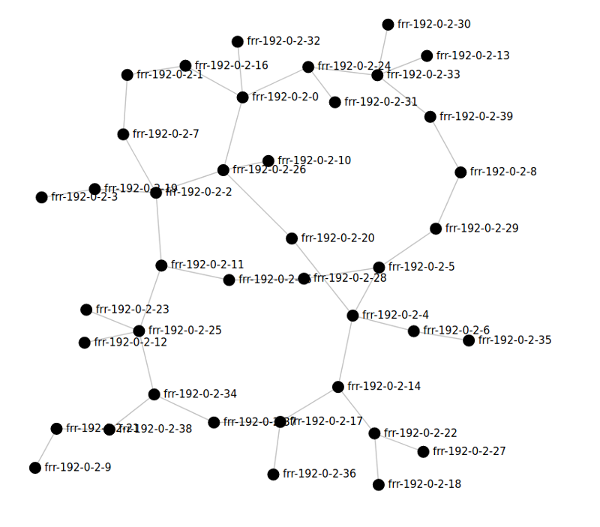
You can run some pretty big topologies even on such a small cluster, such as this 40-node random topology:
Overall it’s a capable, compact setup for experimenting with software routers. In my role as a maintainer for FRR it serves particularly well as a testbed for that project, especially for development related to our Docker images.
Fair warning: this involves a lot of source builds. The software industry - and this is especially true of the k8s / Docker communities - is largely an amd64 monoculture these days, and our target platform is ARM. Furthermore, Kubernetes is notoriously complicated and somewhat underdocumented and takes full advantage of semantic versioning to regularly break its APIs between versions. Similarly, the Go ecosystem is still a moving target and language features relied upon by tooling often require recent versions. Finally, anyone who’s worked with Kubernetes before knows that there’s really no such thing as Kubernetes; there’s only Kubernetes implementations, each of which have their own little quirks that like to block you. k3s seems to be one of the better ones in this regard but there are still quirks.
Because of these factors, and because of the painfully slow build time of large software on Raspis, this project is a rather involved and will probably take at least a full day. Nevertheless, with perseverance, we shall prevail.
Prerequisites
- A k3s cluster of Raspberry Pis, or similar armv7l devices with hard float support
- Raspbian 10
bash- all of my command lines are specific tobashbut could be adapted to other shells. Also, they’re all implied to be root shells.-
Docker, on the master node:
apt install docker.io - Patience
I cannot emphasize hard float enough. Unfortunately nobody cares about soft float devices, especially Python. If you are on soft float do not waste your time. If you do attempt this project on soft float and succeed, I’d love to hear about it.
Note that while my target device, Pi 3B+, is a 64-bit platform, I have tried to avoid taking the easy way out and downloading prebuilt arm64 binaries. That is what got us into this monoculture mess to begin with. I do liberally download 32 bit armv5 binaries though, because some of the tools used can take days to build on a Raspberry Pi (looking at you protobuf). These should be largely compatible across most ARM devices.
Also, before we go any further, add this line to the end of your .bashrc:
export KUBECONFIG=/etc/rancher/k3s/k3s.yaml
A lot of tools look at this environment variable to know where the k8s global config is.
Guide
Best to begin from the top.
End goal: Get k8s-topo running.
Step 1: Install Dependencies
The main thing k8s-topo needs is a way to configure appropriate network
devices in a Kubernetes-sanctioned way; something to sit on top of the “native”
Kubernetes networking sludge and provide a playground to allow us to create
interfaces accessible to our containers and wire them up. k8s-topo supports
two methods of configuring the network resources it needs.
The first is via a “CNI plugin” (Container Network Interface). When k8s is told
that it needs to create some network resources, it first looks at a
predetermined location on the node - typically /etc/cni/net.d/ - for a config
file(s). This config file tells it which CNI plugins are available and which
one to call. In particular, the config file specifies the path of the plugin
binary, some general k8s-related options, and some binary-specific options to
pass. K8s then calls this binary, passes it the requested state of the cluster
network in environment variables, and expects the binary to make it so. The
binary itself typically interacts with the k8s API server to perform its
actions, although it may do so indirectly by way of other tools, or even with
other CNI plugins.
The author of k8s-topo, @networkop, has built
a CNI plugin called meshnet-cni.
There is a nice (but slightly outdated) writeup on it
here. Tl;dr it creates
veth’s for connectivity between pods on the same node and runs a daemon on
all the nodes to coordinate creation of VXLAN p2p links for cross-node pod
connectivity. When I started on this project, it didn’t have support for k8s
1.18, which is what I was using. After opening a GitHub issue asking dumb
questions in which I mentioned this fact, he updated it to support 1.18 (thank
you!). By that time I had already attempted to use the other supported method,
NetworkServiceMesh. I got pretty far, but
ultimately ran into some behavior that appears to be either a bug in NSM or a
misconfiguration by me that I was not able to solve. For completeness, I’ll
cover my attempts on that front in case you want to try this method out. Maybe
someone reading this will tell me what I did wrong.
NetworkServiceMesh does sort of the same thing as meshnet-cni, but in a
different way. Since my end goal was really just to get my network sims going I
didn’t spend too much time researching what a “Service Mesh” is, but in NSM’s
case it seems to mean sidecar containers that deploy alongside your pods and
provide network connectivity things.
I’ve detailed my efforts towards setting up NetworkService mesh below, but it’s collapsed to save a bit of space.
Setting Up NetworkServiceMesh
I was not able to get this working. I feel like I got pretty close, so if you’re adventurous perhaps you can figure out the last piece of the puzzle, I would love to know about it.
NSM is deployed with Helm, so we have to set up Helm first. Helm is like a package manager for k8s.
Download a Helm binary release from the GitHub releases page. NSM only supports
Helm 2, so we’ll need to install that first. At time of writing, 2.16.7 is the
latest version, so that’s what I used. Make sure to download the arm archive.
(Actually shortly after I wrote this, NSM gained support for Helm 3. I didn’t try it since Helm 2 works.)
wget https://get.helm.sh/helm-v2.16.7-linux-arm.tar.gz
Extract the archive and “install” Helm:
tar xvzf helm-v2.16.7-linux-arm.tar.gz
cp linux-arm/helm /usr/local/bin/helm
The Helm client is now installed. Next step is to install the backend, called
tiller. k3s is a bit particular regarding permissions, so we need to give
tiller its own k8s service account to do stuff with.
kubectl -n kube-system create serviceaccount tiller

kubectl create clusterrolebinding tiller \
  --clusterrole=cluster-admin \
  --serviceaccount=kube-system:tiller
References:
- https://kubernetes.io/docs/tasks/configure-pod-container/configure-service-account/
- https://rancher.com/docs/rancher/v2.x/en/installation/options/helm2/helm-init/
Now we start getting to the x86 monoculture stuff.
The backend for Helm, tiller, runs in a container in the k8s cluster itself.
Despite the Rancher docs claiming you can simply helm init, in reality, if
you do this Helm downloads and deploys an amd64 tiller image. Obviously on
ARM this won’t work; it will just crash with exec format error. We need an
ARM image. As it turns out, Helm doesn’t actually build these, because real
computers are all amd64, right?
Fortunately, someone looking out for us
aliens builds ARM images of tiller and publishes them on his personal
DockerHub registry. I could write another post railing against binary-only
dependencies downloaded from random people on the internet, maybe another time.
Hopefully his registry is still available when you’re reading this document. If
not you’ll have to find out how to build tiller for ARM yourself.
To initialize Helm with an appropriate backend image:
helm init --service-account tiller --tiller-image=jessestuart/tiller:v2.16.7
Note the tag. If you downloaded a later version of Helm 2 earlier, you’ll
need to change the tag version to match. The backend version must match the
client version (you can see what you installed with helm version).
Next we’ll have to build NSM ourselves, because they don’t provide images for anything except amd64.
Much of NSM is written in Go, so we need the appropriate Go version. Since Go is rapidly changing, you might have to tweak the version listed here; at time of writing, NSM requires Go 1.13. Other things require Go, and 1.13 worked for everything else I built, so this seems to be a good version.
Install Go 1.13:
wget https://dl.google.com/go/go1.13.11.linux-armv6l.tar.gz
tar -C /usr/local -xzf ./go1.13.11.linux-armv6l.tar.gz
export PATH=$PATH:/usr/local/go/bin
Clone the NSM repo:
git clone https://github.com/networkservicemesh/networkservicemesh.git
cd networkservicemesh
NSM has two forwarding plane implementations available. One is based on VPP (the default), the other uses the kernel. The VPP image, naturally, doesn’t support our particular flavor of ARM:
root@clusterpi-master:/home/pi/vpp-agent# make prod-image
IMAGE_TAG= ./docker/prod/build.sh
Current architecture (armv7l) is not supported.
Fortunately the kernel forwarder does support ARM, so we’ll use that one instead.
Not having found anything in the NSM docs about how to properly build this thing for ARM, very hacky procedures follow.
By default, the recommended make invocation in the NSM docs builds test
images, one of which uses the VPP forwarder, so we need to turn that off. Also
turn the forwarder itself off.
cd into your NSM clone and apply the following patches:
Patch 1:
diff --git a/forwarder/build.mk b/forwarder/build.mk
index 0d24b89f..23c1cac4 100644
--- a/forwarder/build.mk
+++ b/forwarder/build.mk
@@ -12,7 +12,7 @@
 # See the License for the specific language governing permissions and
 # limitations under the License.

-forwarder_images = vppagent-forwarder kernel-forwarder
+forwarder_images = kernel-forwarder
Patch 2:
diff --git a/test/build.mk b/test/build.mk
index 97354fbf..d1aff0d3 100644
--- a/test/build.mk
+++ b/test/build.mk
@@ -14,7 +14,7 @@

 test_apps = $(shell ls ./test/applications/cmd/)
 test_targets = $(addsuffix -build, $(addprefix go-, $(test_apps)))
-test_images = test-common vpp-test-common
+test_images = test-common # vpp-test-common
At this point we can build the project. This takes about an hour on my Pi 3B+.
make k8s-build
In order to work around some other stuff, we’ll need raw tarballs of the Docker
images we just built. There’s a make target to save all those.
make k8s-save
Your built images are now in your local docker registry, but k3s doesn’t use
that, it has a private one. If you try to deploy the NSM Helm chart at this
point, you’ll end up pulling the amd64 images. These images will then be cached
on every single one of your nodes, and will not be pulled again due to the pull
policy in NSM’s pod specs being IfNotPresent, leading to much pain.
In case you already did this by mistake, you’ll need to log into each node and run the following to delete the amd64 images from the cache:
k3s ctr images list | grep networkservicemesh | cut -d' ' -f1 | xargs k3s ctr images remove
We now need a way to make our Kubernetes pods use our locally-built ARM images.
There’s two ways of doing this, the correct way and the hacky way. The correct
way is to set up a Docker registry, retag all of the images we just built and
upload them to this registry, reconfigure your entire cluster to use this
registry, and rewrite the Helm charts to point at it instead of the default
docker.io. The hacky way is to just inject our images into the image cache on
each node so that the nodes believe they have the latest version of the
upstream images and thus defer to our cached ARM images instead of the upstream
amd64 images.
You could also create a local registry and serve your images from there; I tried this, ran into some TLS issues, canned it.
Hacky way
All the images you saved in make k8s-save should be in build/images as
tar archives.
On each cluster node:
scpthe images to your node, like/tmp/images-
Run this:
for file in ./*; do k3s ctr images import $file; done
Note you’ll have to do this for other images later on, so it’s probably better to just use DockerHub.
Correct Way
Retag your built images and push them to your personal DockerHub repository.
Now, at last, you can deploy NSM:
SPIRE_ENABLED=false INSECURE=true FORWARDING_PLANE=kernel make helm-install-nsm
At this point the containers deployed successfully, but the problem I ran into was some kind of communications between two of NSM’s containers, similar to this bug.
By this time meshnet-cni was ready to try again so I went in that direction
again.
Instead of NSM I ended up going with meshnet-cni, and I recommend you go this
route as well; it’s lighter, simpler and created by the author of k8s-topo
specifically for use with that project. Consequently, changes to one are less
likely to break the other :)
Setting up meshnet-cni
Just like with NetworkServiceMesh, we have to make a lot of adjustments, build
custom images, etc. I’ve already done these and put them in a fork of
meshnet-cni, so rather than walk through the necessary changes you can just
clone my branch:
git clone --single-branch --branch k3s-arm https://github.com/qlyoung/meshnet-cni.git
Brief summary of changes made:
- Change all binary downloads to fetch ARM versions
- Modify CNI config files for k3s Flannel
- Remove node selectors that restrict to amd64 nodes
- Change docker images to point at ARM-compatible builds with above changes
- Modify CNI config paths to place them in the custom k3s locations
The last one does require some manual patching. k3s does not use the standard
/etc/cni/net.d location for CNI configs. It will only look at that directory
if you disable the built-in CNI, Flannel. However, meshnet-cni works by
layering additional network resources on top of resources created by a
lower-level CNI referred to as the “delegate”; in this case Flannel. If we
disable Flannel and replace it wholesale with meshnet-cni, things will not
work, but if we leave Flannel enabled, then /etc/cni/net.d is completely
ignored. This is an unfortunate design choice by k3s that also precludes use of
other CNIs that follow the “delegate” pattern, such as Multus. However, we can
workaround this by simply installing our CNI to k3s’s custom location, which is
/var/lib/rancher/k3s/agent/etc/cni/net.d.
But it gets more complicated. That path is where the CNI configs go, but the
CNI binaries go somewhere else, again not the default k8s location. And in the
case of the binaries, the k3s equivalent path includes a cluster-specific GUID
:-). We need to find this GUID and tweak meshnet-cni before installing to
know it. Fortunately this customization is only relevant for the k8s manifests
and doesn’t need to be hardcoded in the Docker images, so you can use the k3s +
ARM images I’ve already built instead of having to build your own.
To find the GUID:
ls /var/lib/rancher/k3s/data
There should be a single directory there whose name is a long hash-looking string, in my case:
#  ls /var/lib/rancher/k3s/data
ec54df8c1938fe49660230d16334b4c7e83888a93e6f037fd8552893e2f67383/
To make sure meshnet-cni binaries make it into this location, cd into your
meshnet-cni repo and run this, replacing YOUR_GUID with the GUID you just
found:
export K3S_CNI_GUID=<YOUR_GUID>
sed -i -e "s/YOUR_K3S_GUID/$K3S_CNI_GUID/g" manifests/base/meshnet.yml
Now you should be ready to deploy meshnet-cni. To do this:
apt install -yqq build-essential
make install
If the installation was successful you should now have a meshnet-cni agent
pod running on each node. Verify this:
# kubectl -n meshnet get all
NAME                READY   STATUS    RESTARTS   AGE
pod/meshnet-p7mmq   1/1     Running   2          15d
pod/meshnet-b66vp   1/1     Running   2          15d
pod/meshnet-wqlvz   1/1     Running   0          43s
pod/meshnet-6jk7g   1/1     Running   0          43s

NAME                     DESIRED   CURRENT   READY   UP-TO-DATE   AVAILABLE   NODE SELECTOR   AGE
daemonset.apps/meshnet   4         4         4       4            4           <none>          15d
With luck you should be good to go, and meshnet-cni is now ready to create
the necessary VXLAN devices as directed by k8s-topo.
Step 2 - Disable load balancer
Now that we have our overlay (meshnet-cni) deployed, we’re ready to deploy k8s-topo.
Not!
By default k3s runs a load balancer, which binds ports 80 and 443 on every
node. k8s-topo wants those, so if you try to deploy k8s-topo now, your pods
will remain in Pending because port 80 is in use. Don’t bother trying to
netstat -tln, port 80 won’t show up. But it’s still in use. Kubernetes logic.
Anyway, we need to turn that off:
https://rancher.com/docs/k3s/latest/en/networking/#traefik-ingress-controller
https://github.com/rancher/k3s/issues/1160#issuecomment-561572618
Copied here for posterity:
- Remove traefik helm chart resource:
kubectl -n kube-system delete helmcharts.helm.cattle.io traefik- Stop the k3s service:
sudo service k3s stop- Edit service file
/etc/systemd/system/k3s.serviceand add this line toExecStart:--no-deploy traefik \- Reload the service file:
sudo systemctl daemon-reload- Remove the manifest file from auto-deploy folder:
sudo rm /var/lib/rancher/k3s/server/manifests/traefik.yaml- Start the k3s service:
sudo service k3s start
Probably a good idea to reboot your master node here for good measure.
And finally, we can deploy k8s-topo.
Step 3 - Install k8s-topo
Now that we have our overlay (meshnet-cni) deployed, we’re ready to deploy k8s-topo.
As with meshnet-cni, k8s-topo requires patches to work on ARM. These
patches are much less extensive than the ones to meshnet-cni since nothing
needs to be changed to accommodate k3s; the changes just point the images to
the ARM-compatible ones I’ve built and published in my own DockerHub registry.
Pull my ARM-compatible fork of k8s-topo:
git clone --single-branch --branch k3s-arm https://github.com/qlyoung/k8s-topo.git
One notable change is that I’ve also added support for FRR, which is a significantly upgraded fork of Quagga. The rest of the images will still pull amd64 versions and so at this time the only image you can choose for your topology simulations is the FRR image.
Now you can deploy k8s-topo onto your cluster:
cd k8s-topo
kubectl apply -f manifest.yml
Voila.
Verify that the k8s-topo control pod and associated services have been created:
root@clusterpi-69 # kubectl get all
NAME                            READY   STATUS        RESTARTS   AGE
pod/k8s-topo-86cbbdbddb-xrwlm   1/1     Running       0          55s

NAME                       TYPE        CLUSTER-IP      EXTERNAL-IP   PORT(S)        AGE
service/kubernetes         ClusterIP   10.43.0.1       <none>        443/TCP        22d
service/k8s-topo-service   NodePort    10.43.111.199   <none>        80:30000/TCP   56s

NAME                       READY   UP-TO-DATE   AVAILABLE   AGE
deployment.apps/k8s-topo   1/1     1            1           56s

NAME                                  DESIRED   CURRENT   READY   AGE
replicaset.apps/k8s-topo-86cbbdbddb   1         1         1       55s
That’s it, we’re done!
Step 4 - profit
Now you can log into the k8s-topo control pod and use the CLI tools there.
root@clusterpi-69 # kubectl exec -it deployment/k8s-topo -- sh

/k8s-topo #
/k8s-topo # k8s-topo -h
usage: k8s-topo [-h] [-d] [--create | --destroy | --show | --eif | --lldp | --graph] topology

Tool to create network topologies inside k8s

positional arguments:
  topology     Topology file

optional arguments:
  -h, --help   show this help message and exit
  -d, --debug  Enable Debug

Actions:
  Create or destroy topology

  --create     Create topology
  --destroy    Destroy topology
  --show       Show running topology
  --eif        Enable ip forwarding for cEOS devices
  --lldp       Enable LLDP forwarding for vrnetlab devices
  --graph      Generate a D3 graph
/k8s-topo #
Usage Examples
Create a random FRR topology:
/k8s-topo # cd examples/builder/
/k8s-topo/examples/builder # ./builder 10 3
Total number of links generated: 12
/k8s-topo/examples/builder # sed -i -e 's/qrtr/frr/g' ./random.yml
/k8s-topo/examples/builder # cat random.yml
conf_dir: /k8s-topo/examples/builder/config-random
etcd_port: 32379
links:
- endpoints:
  - frr-192-0-2-2:eth1:10.0.0.2/30
  - frr-192-0-2-5:eth1:10.0.0.1/30
- endpoints:
  - frr-192-0-2-2:eth2:10.0.0.5/30
  - frr-192-0-2-4:eth1:10.0.0.6/30
- endpoints:
  - frr-192-0-2-0:eth1:10.0.0.10/30
  - frr-192-0-2-4:eth2:10.0.0.9/30
- endpoints:
  - frr-192-0-2-0:eth2:10.0.0.13/30
  - frr-192-0-2-9:eth1:10.0.0.14/30
- endpoints:
  - frr-192-0-2-3:eth1:10.0.0.18/30
  - frr-192-0-2-9:eth2:10.0.0.17/30
- endpoints:
  - frr-192-0-2-3:eth2:10.0.0.21/30
  - frr-192-0-2-7:eth1:10.0.0.22/30
- endpoints:
  - frr-192-0-2-0:eth3:10.0.0.25/30
  - frr-192-0-2-6:eth1:10.0.0.26/30
- endpoints:
  - frr-192-0-2-4:eth3:10.0.0.29/30
  - frr-192-0-2-8:eth1:10.0.0.30/30
- endpoints:
  - frr-192-0-2-1:eth1:10.0.0.34/30
  - frr-192-0-2-4:eth4:10.0.0.33/30
- endpoints:
  - frr-192-0-2-1:eth2:10.0.0.37/30
  - frr-192-0-2-8:eth2:10.0.0.38/30
- endpoints:
  - frr-192-0-2-6:eth2:10.0.0.42/30
  - frr-192-0-2-8:eth3:10.0.0.41/30
- endpoints:
  - frr-192-0-2-0:eth4:10.0.0.45/30
  - frr-192-0-2-5:eth2:10.0.0.46/30
publish_base:
  22: 30001
Apply the topology:
/k8s-topo/examples/builder # cd /k8s-topo/
/k8s-topo # k8s-topo --create examples/builder/random.yml
INFO:__main__:All topology data has been uploaded
INFO:__main__:All pods have been created successfully
INFO:__main__:
 alias frr-192-0-2-2='kubectl exec -it frr-192-0-2-2 sh'
 alias frr-192-0-2-5='kubectl exec -it frr-192-0-2-5 sh'
 alias frr-192-0-2-4='kubectl exec -it frr-192-0-2-4 sh'
 alias frr-192-0-2-0='kubectl exec -it frr-192-0-2-0 sh'
 alias frr-192-0-2-9='kubectl exec -it frr-192-0-2-9 sh'
 alias frr-192-0-2-3='kubectl exec -it frr-192-0-2-3 sh'
 alias frr-192-0-2-7='kubectl exec -it frr-192-0-2-7 sh'
 alias frr-192-0-2-6='kubectl exec -it frr-192-0-2-6 sh'
 alias frr-192-0-2-8='kubectl exec -it frr-192-0-2-8 sh'
 alias frr-192-0-2-1='kubectl exec -it frr-192-0-2-1 sh'
Log out of the container and verify that the pods have been created:
root@clusterpi-69 # kubectl get all
NAME                            READY   STATUS        RESTARTS   AGE
pod/k8s-topo-86cbbdbddb-xrwlm   1/1     Running       0          6m18s
pod/frr-192-0-2-2               1/1     Running       0          35s
pod/frr-192-0-2-5               1/1     Running       0          35s
pod/frr-192-0-2-7               1/1     Running       0          34s
pod/frr-192-0-2-9               1/1     Running       0          35s
pod/frr-192-0-2-4               1/1     Running       0          35s
pod/frr-192-0-2-3               1/1     Running       0          34s
pod/frr-192-0-2-1               1/1     Running       0          33s
pod/frr-192-0-2-0               1/1     Running       0          35s
pod/frr-192-0-2-6               1/1     Running       0          34s
pod/frr-192-0-2-8               1/1     Running       0          34s
Log into one of the pods and have a look around:
root@clusterpi-69 # kubectl exec -it pod/frr-192-0-2-2 -- sh
/ # ip addr
1: lo: <LOOPBACK,UP,LOWER_UP> mtu 65536 qdisc noqueue state UNKNOWN group default qlen 1000
    link/loopback 00:00:00:00:00:00 brd 00:00:00:00:00:00
    inet 127.0.0.1/8 scope host lo
       valid_lft forever preferred_lft forever
    inet6 ::1/128 scope host
       valid_lft forever preferred_lft forever
3: eth0@if31: <BROADCAST,MULTICAST,UP,LOWER_UP> mtu 1500 qdisc noqueue state UP group default
    link/ether ca:c9:8b:1f:d6:69 brd ff:ff:ff:ff:ff:ff link-netnsid 0
    inet 10.42.2.116/24 scope global eth0
       valid_lft forever preferred_lft forever
    inet6 fe80::c8c9:8bff:fe1f:d669/64 scope link
       valid_lft forever preferred_lft forever
40: eth2@if41: <BROADCAST,MULTICAST,UP,LOWER_UP> mtu 1500 qdisc noqueue state UP group default
    link/ether e2:72:df:0f:93:55 brd ff:ff:ff:ff:ff:ff link-netnsid 1
    inet 10.0.0.5/30 brd 10.0.0.7 scope global eth2
       valid_lft forever preferred_lft forever
    inet6 fe80::e072:dfff:fe0f:9355/64 scope link
       valid_lft forever preferred_lft forever
42: eth1@if43: <BROADCAST,MULTICAST,UP,LOWER_UP> mtu 1500 qdisc noqueue state UP group default
    link/ether 2e:af:91:d4:c1:b0 brd ff:ff:ff:ff:ff:ff link-netnsid 2
    inet 10.0.0.2/30 brd 10.0.0.3 scope global eth1
       valid_lft forever preferred_lft forever
    inet6 fe80::2caf:91ff:fed4:c1b0/64 scope link
       valid_lft forever preferred_lft forever
/ # vtysh
% Can't open configuration file /etc/frr/vtysh.conf due to 'No such file or directory'.

Hello, this is FRRouting (version 7.5-dev_git587162029617).
Copyright 1996-2005 Kunihiro Ishiguro, et al.

frr-192-0-2-2#
frr-192-0-2-2# sh run
Building configuration...

Current configuration:
!
frr version 7.5-dev_git587162029617
frr defaults traditional
hostname frr-192-0-2-2
no ipv6 forwarding
!
line vty
!
end
frr-192-0-2-2#
Welcome to your simulation.
Notes
I’ve extensively replaced various components of this setup with my own forks to which I’ve added ARM support. I plan to merge the ARM changes back into their respective upstream repos, but this is going to take some time, as the changes I’ve done currently are very quick-and-dirty. They need to be rewritten not just to work on ARM, but to generalize amd64-specific build options to work on any target architecture.
I very much dislike making this setup depending on my personal GitHub forks and DockerHub registry, but doing so was the only way I could finish this project in a reasonable time frame.